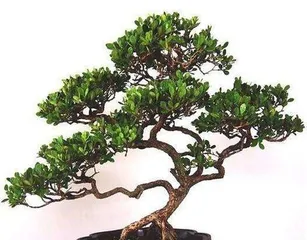
As a traditional cultural art, bonsai is widely loved by people. However, long-term growth can easily lead to soil aging and pest infestations, so timely soil replacement and repotting are necessary steps to maintain the healthy growth of bonsai. This article will provide a detailed introduction to the steps and precautions for repotting bonsai, helping you to give your bonsai a new lease on life.
I: Preparing Tools and Equipment
Repotting requires: new soil, a bucket, a watering can, a flower hoe, a shovel, small bamboo skewers, vermiculite, and other tools. Preparing the tools and equipment is the first step of repotting and must be complete and clean.
II: Selecting the Right New Soil
Selecting the right new soil is one of the key steps in repotting. Different types of bonsai require different types of new soil; for example, lime-loving plants need slightly acidic soil. In addition, the new soil must be dry, free of weeds and impurities, to ensure the healthy growth of the bonsai.
III: Soaking the Vermiculite
When repotting, the vermiculite needs to be soaked in water to remove dust and attached bacteria. The soaking time is generally 1-2 hours; after soaking, drain it for later use.
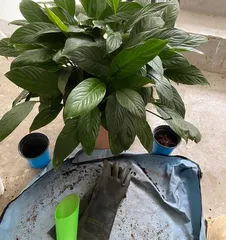
IV: Taking Out the Bonsai
When repotting, the bonsai must first be removed. This process requires careful handling to avoid damaging the roots. For larger bonsai, it is recommended to have two people lift it out together.
V: Cleaning the Old Soil
After removing the bonsai, the old soil needs to be cleaned. This process requires careful operation to clean the old soil thoroughly and avoid damaging the roots.
VI: Trimming the Roots
During the process of cleaning the old soil, the roots of the bonsai need to be trimmed appropriately. The trimmed roots should be slightly exposed and not buried too deeply in the new soil.
VII: Repotting
When repotting, note that a 1-2 cm thick layer of pebbles or perlite should be placed at the bottom of the pot to facilitate water drainage. Pour the new soil into the pot and place the bonsai into it.
VIII: Compacting the New Soil
After placing the bonsai in the new soil, gently compact the soil so that it fits closely with the roots, avoiding excessive air that could affect the plant's growth.
IX: Inserting the Vermiculite
After compacting the new soil, the soaked vermiculite needs to be inserted. Vermiculite not only has a decorative effect but can also absorb excess water and nutrients, protecting the health of the bonsai's roots.
X: Watering
After repotting, water promptly to keep the soil moist. It should be noted that watering should be moderate, not too much or too little.
XI: Light Regulation
Within 1-2 weeks after repotting, the light conditions for the bonsai need to be adjusted appropriately to avoid excessive sunlight or excessive shade.
XII: Management and Maintenance
After repotting, regular management and maintenance tasks such as fertilizing, pruning, and watering are required. The early maintenance period is particularly crucial, requiring timely observation of the bonsai's growth.
XIII: Precautions
The following precautions should be noted when repotting: avoid repotting when the bonsai is in full bloom; avoid frequent repotting; avoid using rusty tools and equipment; avoid direct sunlight after repotting.
XIV: Pest and Disease Control
Bonsai are susceptible to pests and diseases, especially after repotting, which can easily cause plant diseases. Attention must be paid to pest and disease control, and effective measures should be taken in a timely manner.
XV:
Repotting is one of the necessary steps for bonsai care and can maintain the healthy growth of the bonsai. Through the introduction in this article, I believe everyone has a more detailed understanding of repotting, and I hope that everyone can be more proficient in caring for their own bonsai.