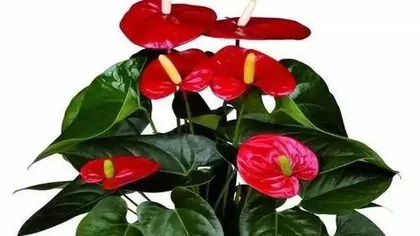
Abstract: Winter is here, is the anthurium at home shivering with cold? Don't worry, I'll teach you how to make a warm "move" for Anthurium today so that it can also be full of vitality in this cold season! 1. Do you know the importance of Anthurium transplantation? Anthurium is a tropical plant...
Winter is here, is the anthurium at home shivering from the cold? Don't worry, I'll teach you how to make a warm "move" for Anthurium today so that it can also be full of vitality in this cold season! 1. The importance of transplanting Anthurium

Do you know that Anthurium is a tropical plant that has high requirements on temperature and humidity. In winter, low temperatures outside can damage the roots of Anthurium andraeanum or even die. Therefore, it is very important to transplant Anthurium indoors in time so that it can live a warm winter. 2. Choose the appropriate transplanting time

Generally speaking, the best transplanting time for Anthurium is late autumn and early winter. At this time, the weather is gradually getting colder, but it has not yet reached its lowest point, which will help Anthurium adapt to the new environment. Of course, if you find that the root system of Anthurium has rotted or is growing poorly, you should hurry up and transplant it. 3. Prepare migration tools and materials

1. New potted pot: Choose a new pot larger than the original pot, preferably a tile pot or ceramic pot with good air permeability.
2. Humus: Anthurium likes soil with good drainage, and humus is the best choice.
3. Fertilizer: Before transplanting, some slow-release fertilizers can be applied to provide Anthurium with the nutrients needed for growth.
4. Scissors: Used to prune the roots and branches of Anthurium andraeanum. 4. Transplantation steps 1. Trim roots: Remove Anthurium from the original pot, use scissors to cut off rotten or excessively long roots, and retain healthy roots.
2. Disinfection: Soak the pruned roots in diluted disinfectant solution for a few minutes to prevent bacterial infection.
3. Filling: Put a layer of humus soil in the new basin, then put Anthurium into the basin and adjust the position.
4. Fill in: Continue filling in humus until the entire basin is filled, and gently compress the soil.
5. Watering: After transplanting, water Anthurium andraeanum once to help the roots and soil closely integrate. 5. Maintenance after transplantation 1. Lighting: Anthurium likes to scatter light. After transplantation, it should be placed in a place with sufficient scattered light to avoid direct sunlight.
2. Watering: Keep the soil slightly moist, avoid standing water, and don't let the soil too dry.
3. Fertilization: Apply slow-release fertilizer every other month to supplement the nutrients needed for the growth of Anthurium.
4. Temperature: Keep the room temperature between 18-25℃ to avoid too low or too high temperatures. 6. Notes 1. Avoid damage: During the transplanting process, operate carefully to avoid damaging the roots, branches and leaves of Anthurium andraeanum.
2. Choose healthy plants: Before transplanting, choose healthy, pest-free Anthurium.
3. Avoid frequent transplantation: Anthurium's root system is fragile, and frequent transplantation will affect its growth.
Through the above steps, I believe that your Anthurium will thrive in winter and add a touch of bright color to your home! Come and try it out and let your anthurium rejuvenate this winter!