Abstract: Clivia is a common and popular indoor plant, and its beautiful leaves are one of its main features. Properly repotting a Clivia, especially concerning its leaves, can promote healthy growth and an attractive appearance. This article will introduce techniques and precautions for correctly repotting a Clivia with attention to its leaves.
Clivia is a common and popular indoor plant, and its beautiful leaves are one of its main features. Properly repotting a Clivia, especially concerning its leaves, can promote healthy growth and an attractive appearance. This article will introduce techniques and precautions for correctly repotting a Clivia with attention to its leaves.
I. Choose the right pot
Select a pot with good breathability and sufficient drainage holes so that the roots of the Clivia can get enough air and water. The size of the pot should be appropriate, neither too big nor too small.
II. Prepare the potting soil
Clivias prefer acidic soil, so before repotting, prepare acidic soil suitable for Clivia growth. You can use specialized Clivia soil or make your own acidic soil.
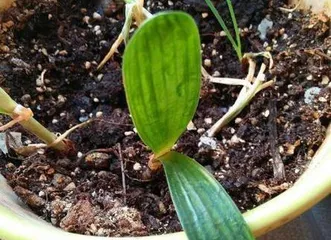
III. Remove old leaves
Before repotting, first remove the old leaves from the Clivia to better observe and handle the roots. At the same time, this can also promote the growth of new leaves on the Clivia.
IV. Gently pull out
Gently pull the Clivia out of the original pot, being careful not to damage the roots. If the roots are tangled together, you can gently cut them apart with scissors.
V. Clean the roots
Gently rinse the roots of the Clivia with clean water to wash away the soil and impurities. This ensures that the soil in the new pot is clean and does not bring in pathogens and insect eggs.
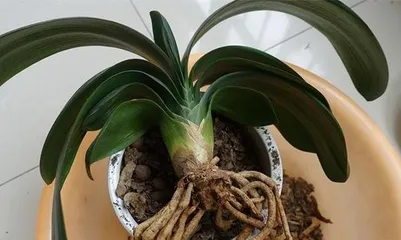
VI. Trim the roots
Check the roots of the Clivia. If there are diseased, pest-infested, or dead roots, trim them off promptly to maintain healthy roots. Use sharp scissors when trimming, and make sure the cuts are smooth.
VII. Place in the new pot
Place the trimmed Clivia into the new pot, making sure to spread the roots evenly and ensure the plant is centered.
VIII. Fill with potting soil
Fill the new pot with acidic soil, gently pat it down and make sure the soil fits tightly against the plant's roots. Do not fill it too full to avoid compressing the roots.
IX. Water
After repotting, water the Clivia promptly with an appropriate amount of water to keep the soil moist but not waterlogged. Newly repotted Clivias need special attention to maintaining moderate humidity.
X. Place in a well-ventilated area
The newly repotted Clivia should be placed in a well-ventilated location, avoiding direct sunlight and cold environments. Adequate ventilation helps the plant grow healthily.
XI. Avoid over-fertilization
The repotted Clivia should not be fertilized immediately; wait for a period to let the plant recover before fertilizing. Over-fertilization can harm the Clivia.
XII. Observe growth conditions
After repotting, carefully observe the growth of the Clivia, paying attention to any occurrence of diseases or pests, and take timely measures for prevention and control.
XIII. Maintain suitable temperature
Clivias like warm environments. After repotting, maintain a suitable temperature to avoid high or low temperatures affecting the plant.
XIV. Regular maintenance
The repotted Clivia needs regular maintenance, including appropriate watering, moderate fertilization, and leaf trimming. Pay attention to maintaining suitable humidity and light conditions.
XV.
Properly repotting a Clivia with attention to its leaves is a key step to ensure the healthy growth and attractive appearance of the Clivia. Steps such as choosing the right pot, preparing acidic soil, removing old leaves, gently pulling out the roots, cleaning and trimming the roots are all very important. During the post-repotting care process, pay attention to maintaining suitable temperature, humidity, and light conditions, and regularly perform maintenance work to ensure the healthy growth of the Clivia.